Blog
Love the Fabric...
but don't have a clue
what to make with it?
IMAGINE
The Possibilities...
July 16, 2018
Possibili-Tease Viscose Voile
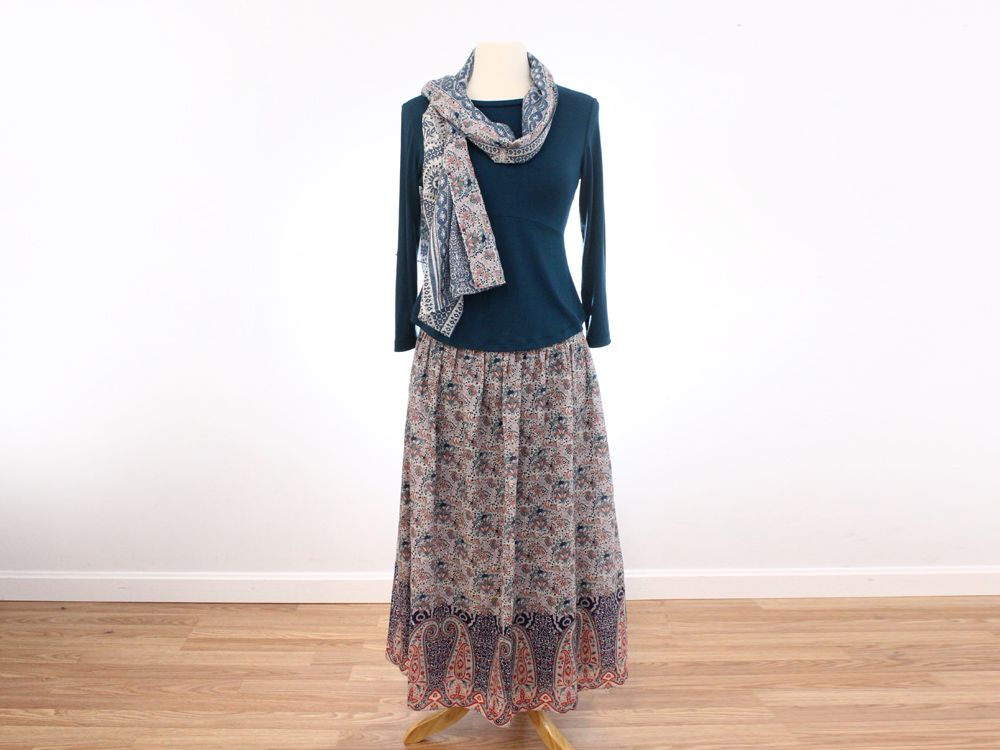
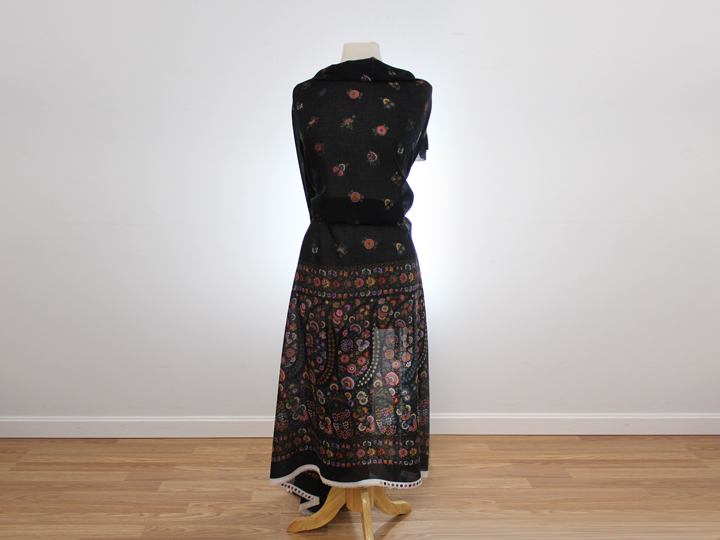
Each time I cut this fabric for one of our customers, I fall in love with it all over again! I finally made the time to make it into an outfit for myself! This fabric is so light and cool, it feels as if I am wearing nothing!
We added this fabric to our spring/summer collection believing that there would be many ways to create gorgeous outfits from it – and therefore we named it Possibili-Tease!
In this issue of “Imagine the Possibilities…” you will be able to review the method and patterns applied to make one cool summer outfit using this fabric. Enjoy!
Materials Used
For The Skirt & Scarf (Size 4 Petite):
- 2 yards of the Possibili-Tease viscose voile fabric.
- 1 yard of the Ambiance lining in black
- 1/4 yard of the Sewers Dream fusible interfacing in black.
- 8 inch matching invisible zipper (side closure).
For The Top (Size 4 Petite):
- 1 1/2 yards of the Jersey – Dark Teal, rayon jersey knit fabric
Why a Black color for the skirt lining?
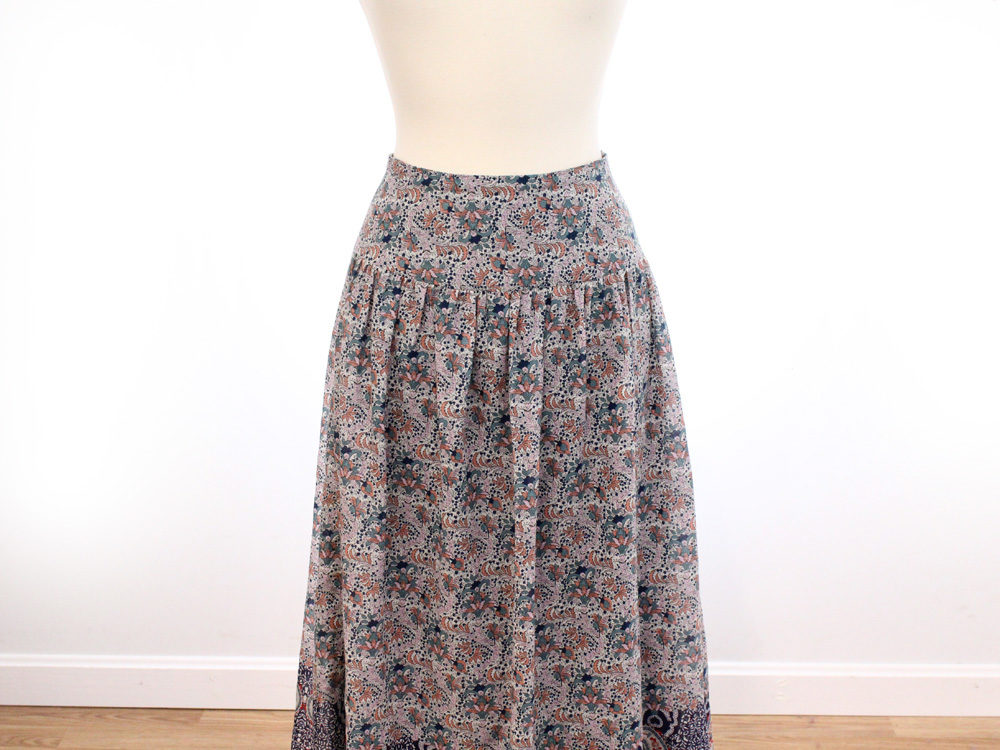
The Possibili-Tease is a voile fabric. Therefore it is a see-through fabric! Choosing a light color lining to match the foundation color of this fabric would not have helped. With a light colored lining, you could still see through both the lining and the fabric – and risk looking as if you are wearing nothing! The black colored lining blocks the light from going through and makes the darker colors of the fabric appear crisper.
The Skirt Pattern – A Commercially Available Option
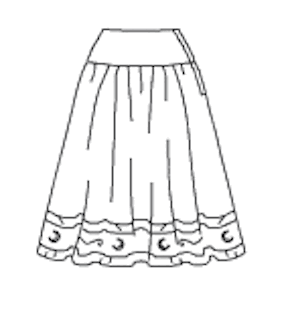
We recommend Vogue Pattern V8295 as the base for the skirt pattern – A gathered skirt with a lined yoke and a side zipper closure.
Please note that you will need to line the lower gathered section of the skirt. We do not recommend gathering the lining as it will add bulk at the hip line. Refer to the “Lower Skirt Lining Pattern” below for recommendations.
For the expert sewist, you may want to follow the steps provided below to assist you in creating your own custom fitted “gathered skirt with yoke” pattern.
Creating Your Own Custom Skirt Yoke Pattern Pieces
Use any A-line or pencil skirt pattern with a side zipper closure, that you may already have and that fits you well, to create the skirt yoke. Repeat these steps once for the front side and once for the back side.
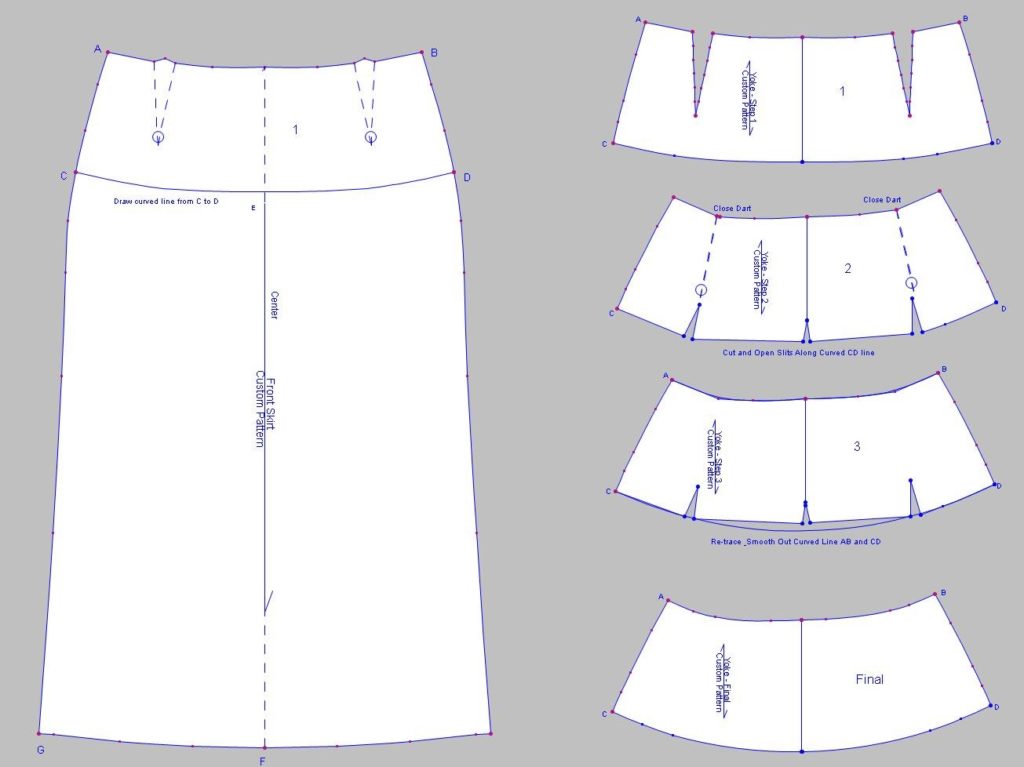
1 – Mark point C about 1 to 2 inches above the hip line at the left side seam of the pattern. Mark point D on the right side seam. Draw a curved line that is parallel to the waist line to outline the yoke – the arched line from C to D. Use a blank paper to trace the top section of the skirt starting at point A, going across to point B, down to point D, continuing across to point C, and connecting back up at point A .
2 – Cut out the traced yoke piece, including the darts.
3 – Make three slits at the curved line between C and D. Close the darts between points A and B and open the slits just enough for the paper to lay flat.
Using An Existing Pattern To Create
The Skirt Yoke And The Skirt Lining
4 – Using a new blank sheet of paper, trace again the yoke and smooth out the lines – keeping the darts between A and B closed. Continue with a curved line to close the gaps created with the slits on the curve between C and D. This is now the new pattern piece for the skirt yoke.
5 – Cut out two skirt yoke pieces of fabric (one for facing) and cut out one piece of fusible interfacing. The yoke facing may be cut out from the lining, if you prefer.
Creating The Lower Skirt Lining Pattern Pieces
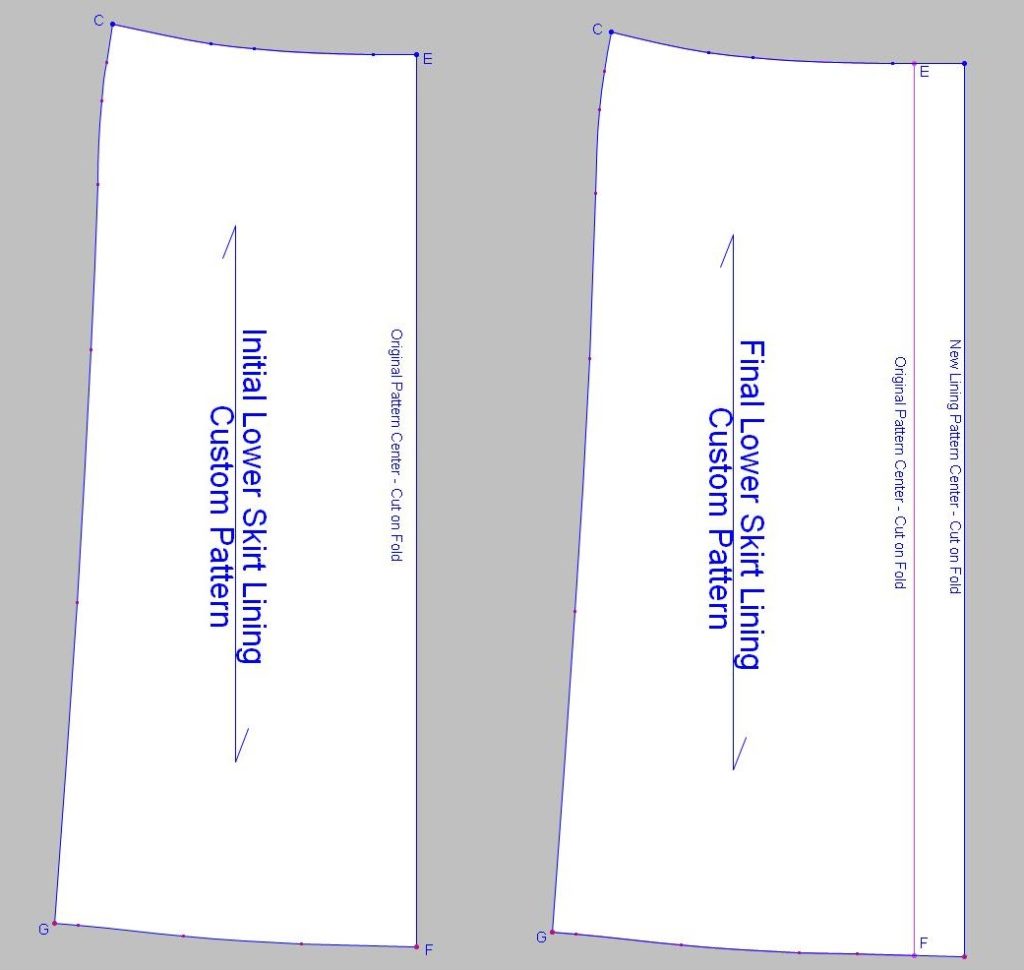
6 – Using a blank sheet of paper, trace half of the lower skirt pattern section (refer to yoke pattern – step 1) starting at point C, going across following the curved line to point E, gliding down to point F, continuing across to point G, and finishing up at point C. The line between E and F is now the temporary center fold for the lining pattern.
7 – The width of this half pattern must now be extended to be equal to half the curved line distance between C and D of the final skirt yoke pattern. This can be simply done by moving the line between E and F to the right by an amount equal to half the total gaps distance created with the opening of the slits – when the yoke was being created in step 3.
8 – Cut the lining pattern pieces on fold.
Note: If using a pencil skirt as the base for recreating the gathered skirt pattern, you may need to keep an opening at the side seam of the lining to start just above the knee.
Creating The Lower Skirt Gathered Pattern Pieces
For the lower skirt gathered pattern pieces, it is best to create the pattern to be cut on the fold. Therefore all horizontal measurements of the pattern will be 1/2 the actual measure. Best to start by folding the skirt yoke pieces in half. You will be creating two lower skirt pieces; one for the front and one for the back by repeating the same steps for each side.
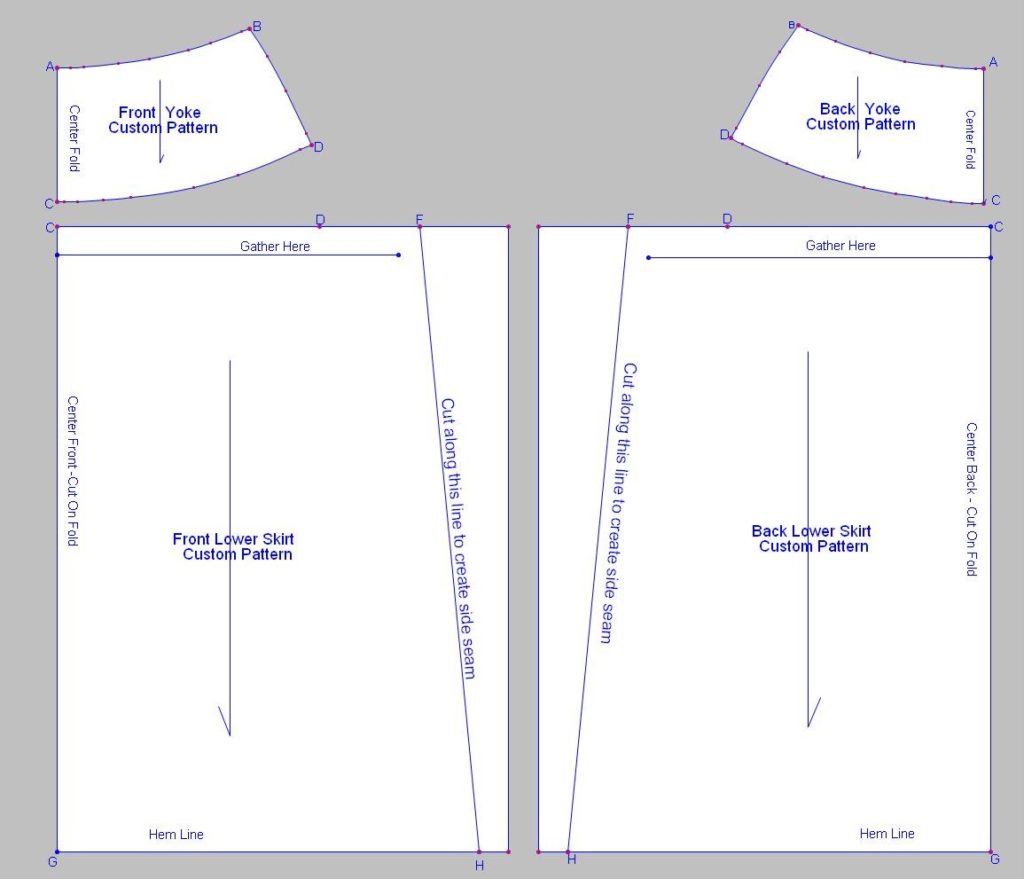
1 – Using a blank sheet of paper, cut out a rectangular piece to the desired length of the skirt minus the depth of the yoke. The width of this piece should be 1/4 the desired width at the skirt hem (normally between 15 and 18 inches). Note that the total skirt hem width is the sum of the back and front sides hem.
2 – Measure the distance along the curved line between C and D on the folded skirt yoke pattern. Multiply this number by 1.33. The extra 1/3 width will be needed for the gathering. If you like more gathering increase the multiplier. If you want less gathering, decrease this multiplier. This new measure will be the width of the gathered lower skirt piece at the yoke side. Mark Point F on the rectangle piece.
Lower Skirt Pattern Pieces – Cut On Fold
3 – Next adjust the width of the rectangle at the hem line and mark point H such that the distance between points G and H is greater than the distance between C and F by 1.5 inches for shorter skirts and by 2.5 inches for longer skirts. (Refer to the line art above)
4 – Draw a line connecting points F and H to create the side seam for the skirt.
The Scarf!
For this specific style, the scarf was cut out from the outer border of the fabric along the entire length of the 2 yards!
Variations…Enabled By The Extra 26-inch Wide Border of the Possibili-Tease Fabric
One variation would be to cut out the lower skirt gathered pieces using the entire width of the large 26-inch border and omitting the scarf! A beautiful top can be made from the remaining printed fabric width.
We are confident that you could imagine more Possibili-Tease! We would love to see what you come up when you do!
Floral Rain
If you are preparing for the fall season, the style or variations of it used to make the outfit with Possibili-Tease fabric may be applied to the Floral Rain fabric – another gorgeous wool/viscose fabric with a large stunning border!
Base Pattern Used to Design The Top
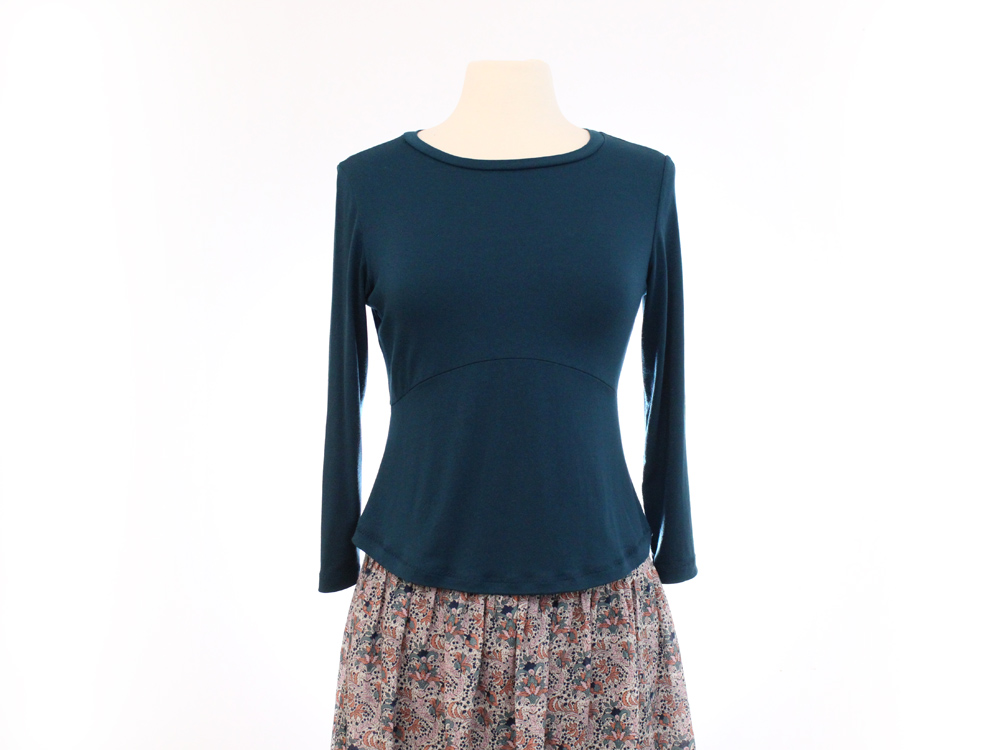
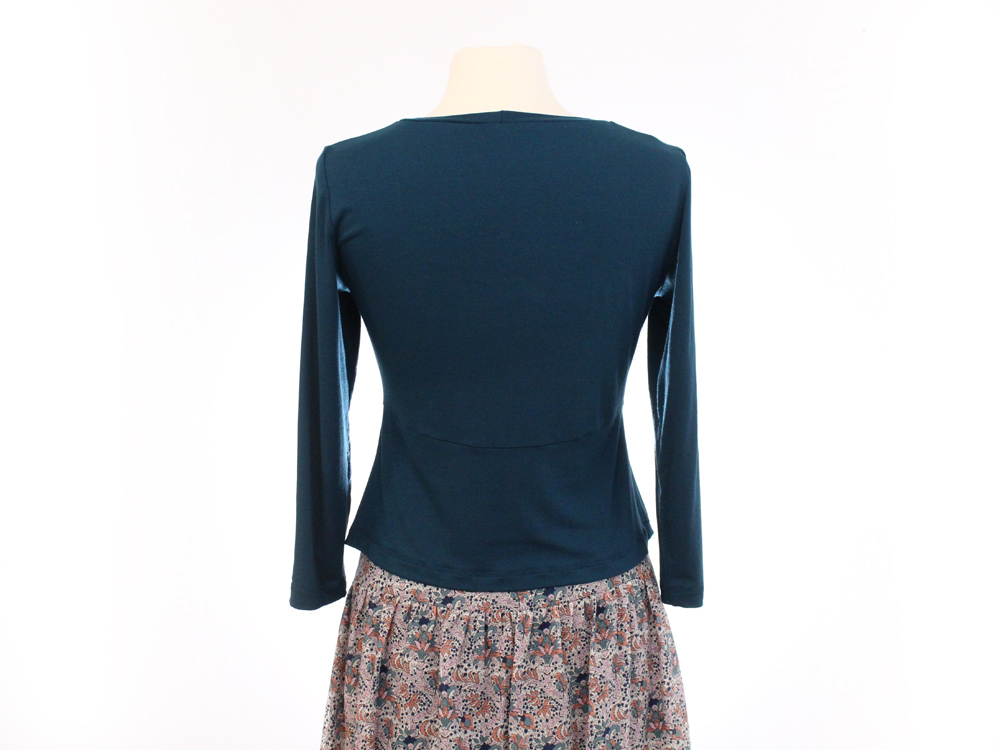
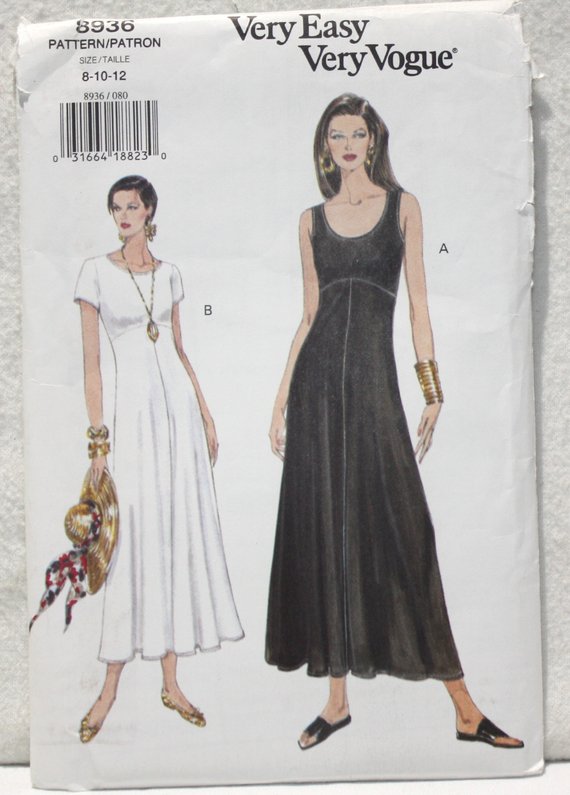
The top was created by adopting the design of an old, out-of-print, Very Easy, Very Vogue Pattern 8936. The changes made to this pattern are too many to simply describe and enable you to successfully recreate the final pattern without the use of a pattern drafting software – A software application that we used to digitize the pattern, modify it, and print it.
Contact us if you wish to obtain a copy of the actual pattern pieces used to create the top.
If you end up giving any of these ideas a try, be sure to send us a photo of your beautiful creations to receive a $5.00 Sawyer Brook coupon!
As always, your feedback and suggestions are most appreciated. Let us know what fabrics you would like us to carry and how we can make your Sawyer Brook shopping experience more enjoyable.


