Blog
Love the Fabric...
but don't have a clue
what to make with it?
IMAGINE
The Possibilities...
April 14, 2020
Are you sewing fabric face masks?
In this issue of “Imagine The Possibilities …”, we provide downloadable PDF files of fabric face mask patterns in three sizes and two different styles. We also share with you a Sew-Along tutorial on how to make your very own fabric face mask with an adjustable elastic band.
Fabric Face Mask Patterns
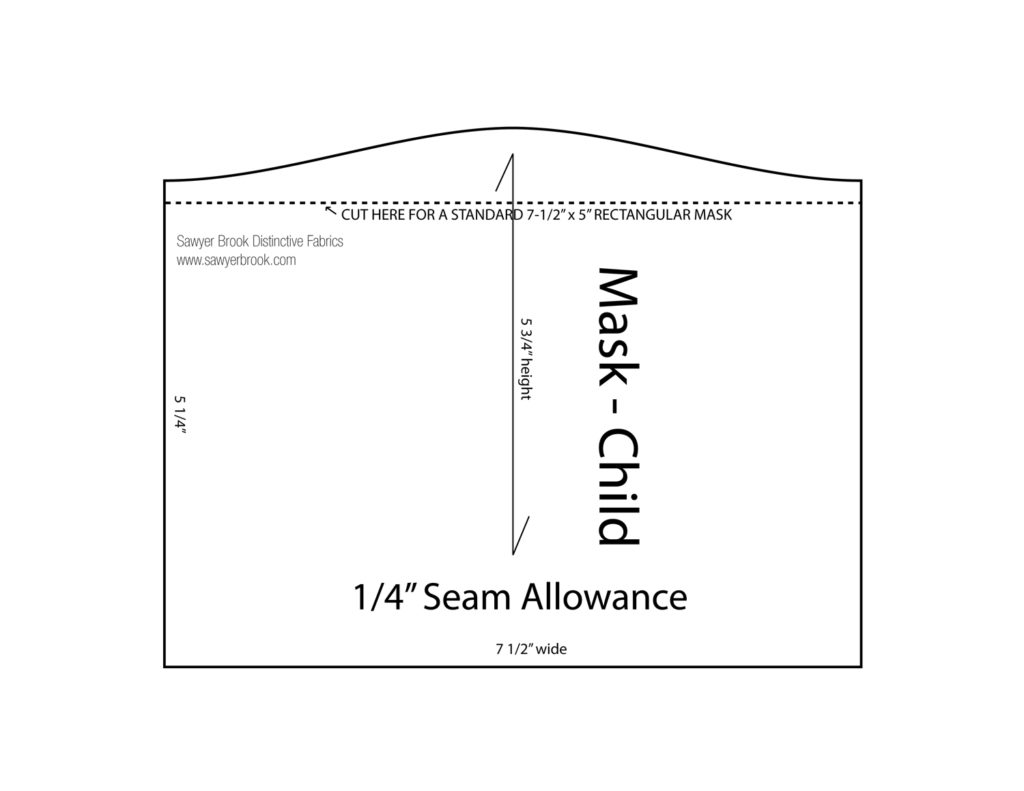
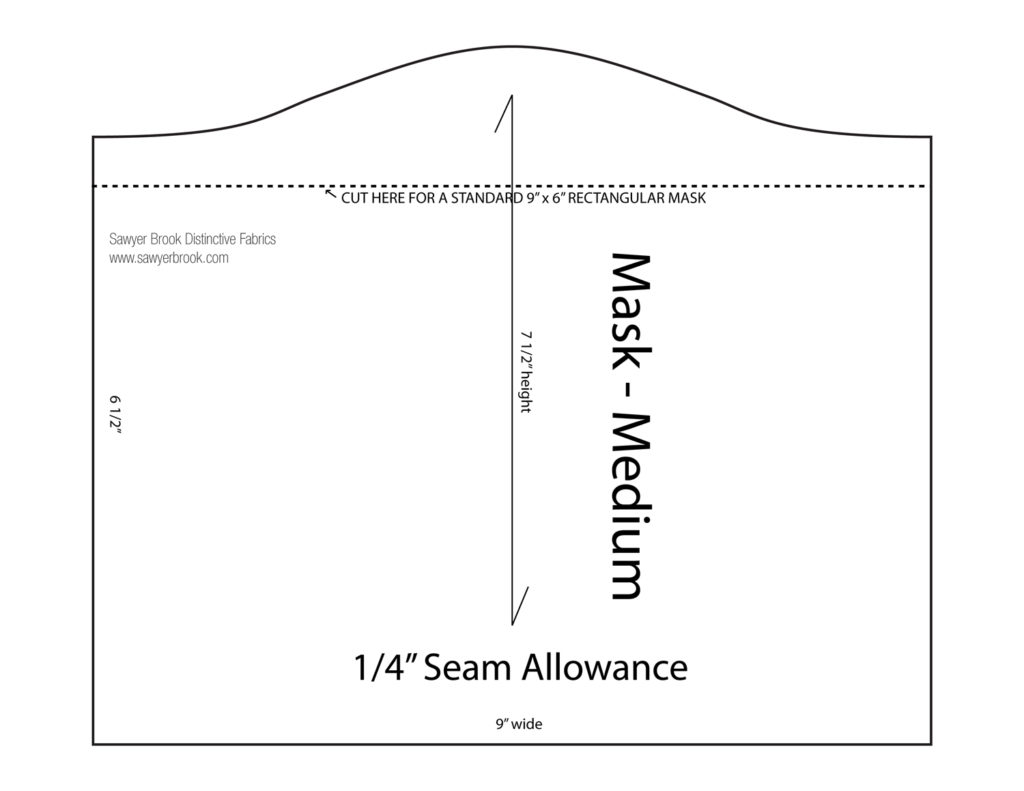
Perhaps many of us started making one-size-fits-all masks cuting 9″x 6″ rectangles for adult-size and 7.5″ x 5″ rectangles for child-size. In making our masks we found that the 9″ x 6″ was too small for most men’s faces and large women’s faces. We also found that curving the top side to rise over the nose provided a better fit and more coverage. We created this modified pattern in three sizes: Large (generally for men), Medium (generally for women), and Child.
We are providing you free copies of these patterns in individual downloadable PDF files. Each can be printed on a single 8.5″ x 11″ size paper. The patterns include two styles: Raised-over-the-nose pattern and standard rectangular pattern.
Download Printable Child Mask Pattern: Child Mask Pattern [pdf]
Printable Fabric Face Masks Patterns in Three Sizes & Two different Styles
Download Printable Large Mask Pattern:Large Mask Pattern [pdf]
Download Printable Medium Mask Pattern: Medium Mask Pattern [pdf]
A Sew-Along on how to make your very own adjustable face mask.
In making our masks, we found that two pieces of standard size elastic attached at each side was not practical for most faces. For some it was too tight. For others it was too loose. We made our masks using and adjustable elastic loop.
This DIY fabric face mask features a contrasting trim at the top and bottom sides. The contrasting trim is made from the backing fabric that is cut 1 5/8″ wider than the main fabric. It also features an adjustable elastic band that loops around the top and bottom sides of the mask. Running the elastic through the top and bottom sides of the mask allowed the fabric to be gathered, as needed, around the nose and chin to provide a snug fit while remaining comfortable at the ears for long hours of wear.
A cotton ball flattened and placed in the gap around the nose between the mask and the face can prevent fogging of glasses (for glass wearers) and minimize/prevent the air from incoming through any gaps. The cotton ball may not be needed if the wearer gathers enough fabric at the nose, depending on the shape of the face.
As indicated by the Surgeon General and the CDC, the fabric mask will not provide full protection from the virus. However, given the current circumstances, It’s better than not having a mask at all!
As always, your feedback and suggestions are most appreciated. Let us know what fabrics you would like us to carry and how we can make your Sawyer Brook shopping experience more enjoyable.


4 comments on “Imagine the Possibilities – April 2020”
Tish Vincent
I sewed a number of your masks. I am curious about the measurements on the patterns. The woman’s pattern states 9″ on the bottom of the mask but the pattern is 7″ wide? Where do the extra 2″come from? Are you supposed to redraw it to a scale of 9″ at the bottom? Or add an inch on each side?
I would appreciate an answer. I thought we might not need masks any more but I am realizing we will need them for a long time to come.
Your tutorial is for a different version of the mask than your downloadable pattern. Please explain.
Your pattern is my family’s favorite. They feel it is easier to see when engaged in sports with this style. I have made various adjustments but am wondering what the official guidance will be.
Thank you, in advance.
Faten
Dear Tish,
Thank you for your question. My first reaction is to ask about the printing process you are using. Are you downloading the PDF file to print or are you using the image of the pattern to print. Please try to print the downloadable file of the pattern making sure that it prints “landscape” format and “actual” size on your printer setup.
The tutorial focused on making the adjustable elastic more than making the mask itself. You can use the same method to make the mask with the rise on the nose pattern and run the elastic through the top curved section of the mask. You could also omit the elastic all together from that side. It’s a good point you make. Perhaps I will tape an addendum of how to run the adjustable elastic in the top curved section of the mask.
Let me know if you have further questions and I will do my best to assist.
Faten
Tish Vincent
Thank you so much! How silly of me! I printed them portrait not landscape. That explains the discrepancy. I am delighted. I love this pattern. My grandson plays baseball and says it is the only mask he can wear that does not get in his visual field as he plays. I have not sewed it with the lining being larger to make the casing. I have made a casing at the ear side of the mask. Some family members prefer the elastic to go over their ears. Others prefer a much longer loop that goes around the lower back of their head and the higher back of their head. With the casing I can change the elastic from one style to the other or replace it if it begins to wear out.
Thank you for your response and for this pattern. I appreciate it very much.
I have subscribed to your service on and off for many years. I remember going to the first Sawyer Brook in a town in New Hampshire north of Hanover. I think it was the first store. I visited it in 1978 before moving away from the Hanover area. You always have such beautiful fabrics.
Tish
Faten
We are delighted to have you back and to be of service to you!
Faten